Want to know the best handstand drills for beginners? Everyone can implement many of the following drills into their hand-balancing practice.
Doing the perfect handstand can be one of the most challenging moves of strength and balance. It requires shoulder mobility to open the shoulders, core strength to keep the trunk straight, and upper body strength to hold your entire body weight.
A perfect handstand takes time to train, and everyone is going to progress at different rates. Just as it took years to learn to walk and stand on our legs as children, it can also take years to master a hand-balance.
This article is going to cover 21 easy handstand drills for beginners that you can do at home.
The Drills:
- Side to Side Wrist Rocks
- Wrist Extension Push-Ups
- Wrist Circles
- Shoulder Circles
- Plank Wrist Rocks
- Scapular Push-Ups
- Handstand Form Holds Face Down
- Pike Shoulder Press
- Boat Ab Holds
- Spider Man Handstand
- Handstand Walk Outs
- Crow Pose
- Tuck Headstand
- Headstand
- Freestanding Handstand
- Handstand Kick-Ups
- L-Shaped Handstand
- Handstand Levers
- Wall Handstand
- Shoulder Taps
- Practice Bailing From Handstand
What Does A Perfect Handstand Look Like?
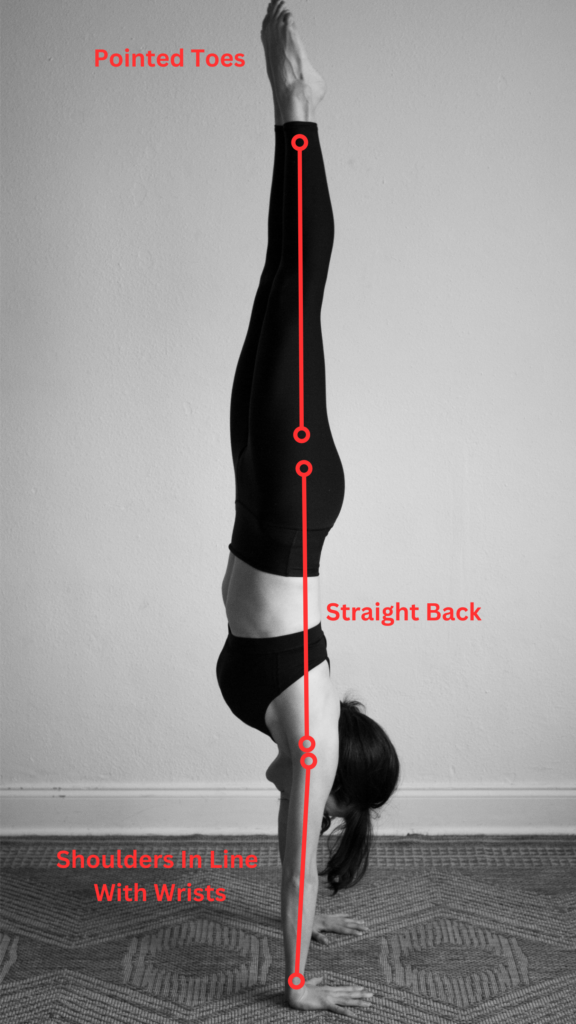
The foundation of a perfect handstand begins with the hands. Hands should be flat on the ground with fingers spread out as much as possible and gripping the floor. This article will cover some drills to strengthen the hands and wrists.
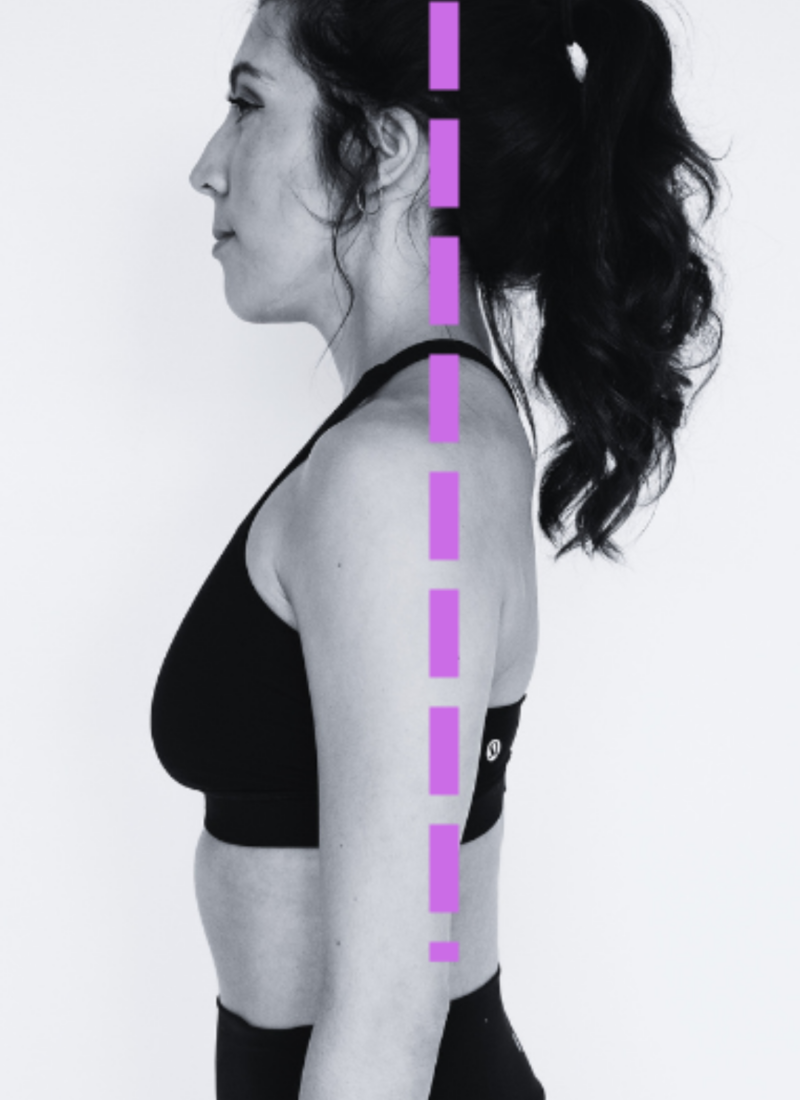
Arms should be straight and shoulder width apart. The shoulders and wrists should ideally stack on top of each other. Oftentimes, beginners that lack the shoulder mobility have difficulty opening up the shoulders to the ideal angle.
The back should be straight without any arching or rounding.
The legs should be straight with knees and ankles together and toes pointed.
Think of the handstand as building from the ground up, and remember, it takes time.
You May Also Like: How to Improve Flexibility and Mobility
The Best Handstand Drills for Beginners
1. Side to Side Wrist Rocks
This exercise helps to strengthen the fingers, hands, and wrists. Just like we use our feet and toes to shift weight and stand upright, we need strong hands to adjust our weight and shift into a position where we can balance.
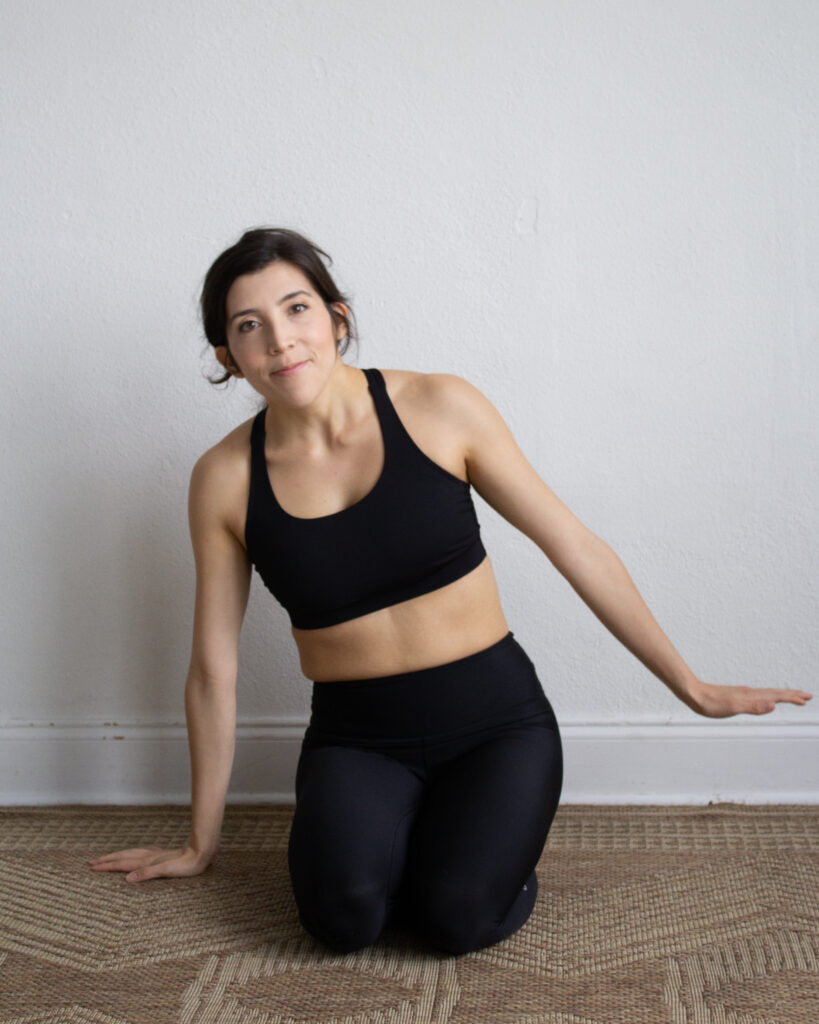
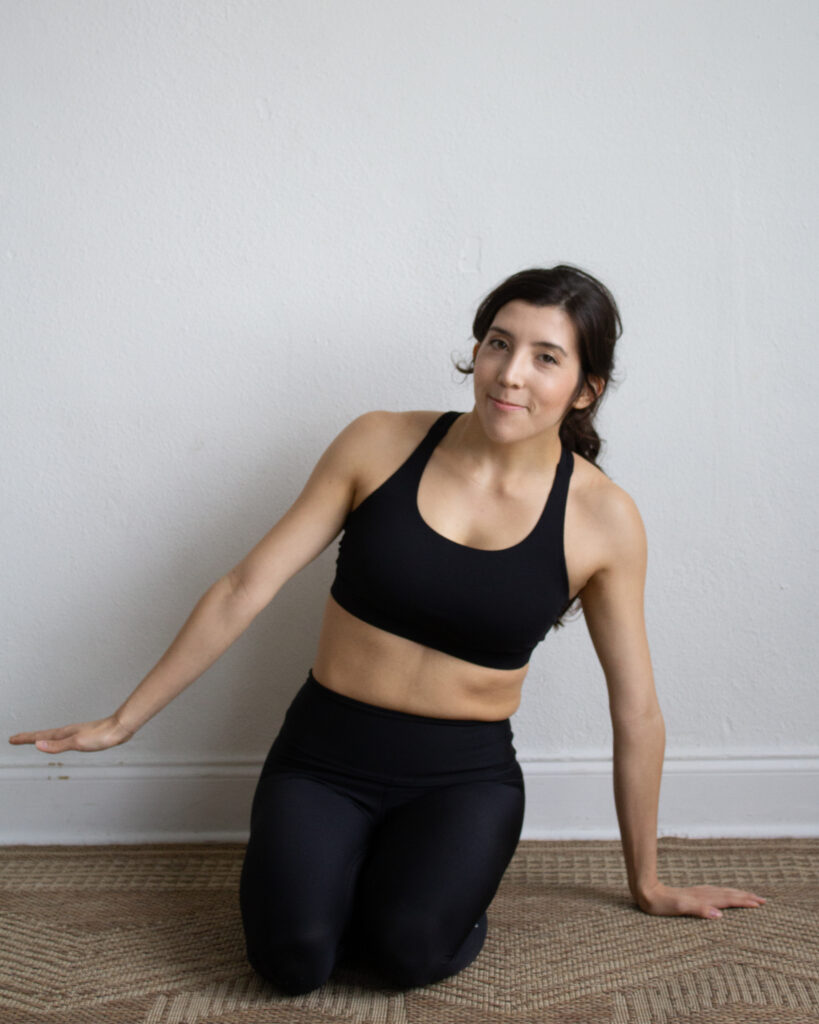
- Sit on the ground and place your hands out to your side.
- Lean towards one side and put some weight into your hands and finger tips.
- Using the strength of your fingers, push yourself to the other side.
- Rock back and forth, using the strength of your fingers to move.
- Repeat 20 times.
2. Wrist Extension Push-Up
I love this exercise for wrist strengthening. As someone who struggles with wrist pain from time to time, this helps relieve any discomfort in my wrists.
- Start on all fours with palms flat on the ground.
- While keeping your shoulders and body still, use the strength of your forearms to straighten your wrists.
- Flatten your hands/palms slowly.
- Repeat 10-20 times.
- Note: Make it easier by leaning your bottom toward your ankles. Make it hard by leaning your shoulders forward.
3. Wrist Circles
This is a great way to warm-up the wrists and get ready for movement. It is essential to take good care of the wrists for hand-balancing training.
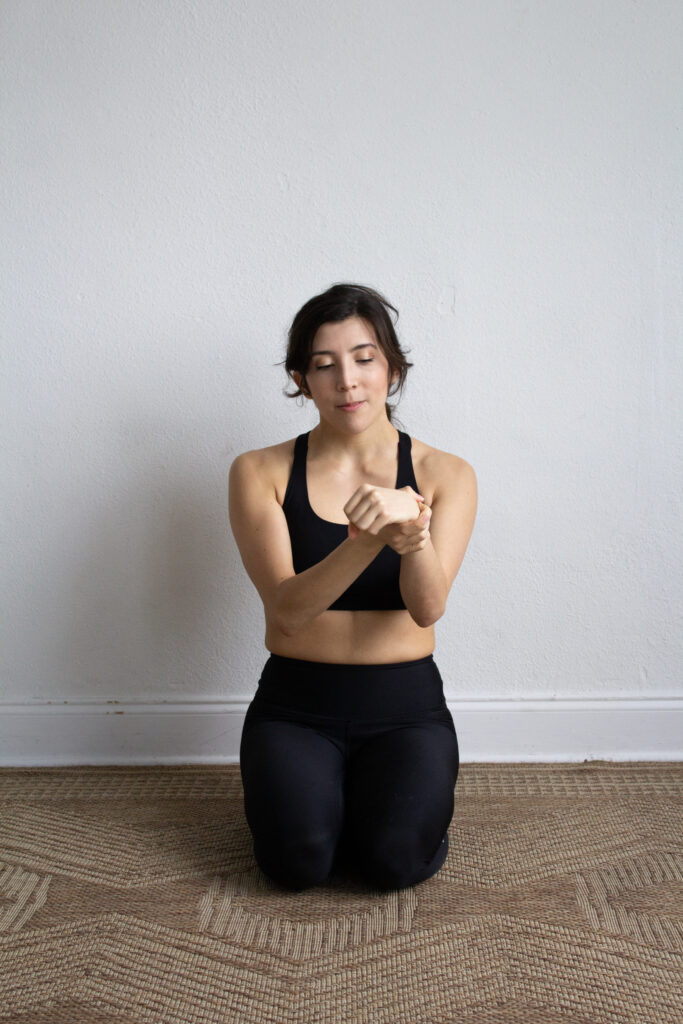
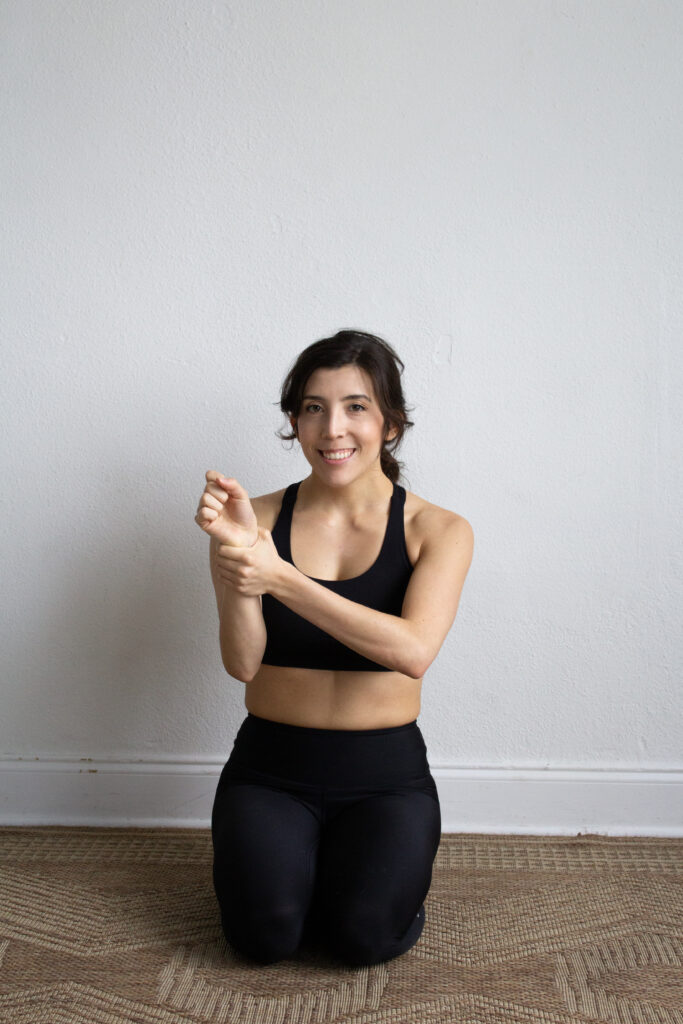
- Hold one wrist with one hand.
- Rotate your wrist slowly counter clockwise and then clockwise.
- Keep your breathing normal.
- Repeat 10 times.
- Repeat on the other wrist.
4. Shoulder Circles
This exercise helps to warm up the shoulders to get ready for strength training.
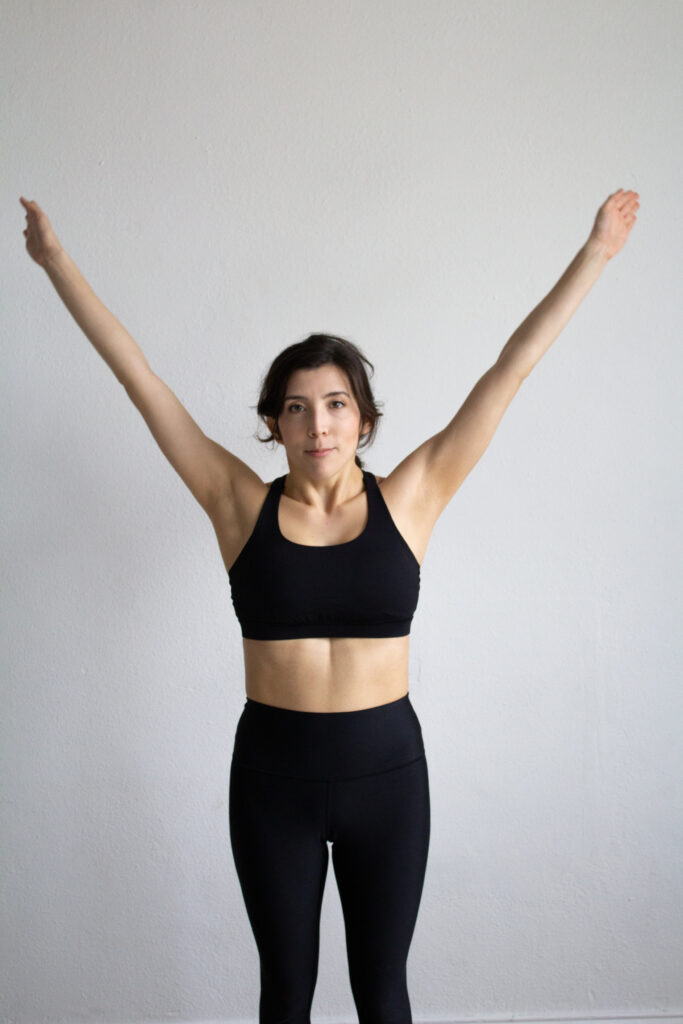
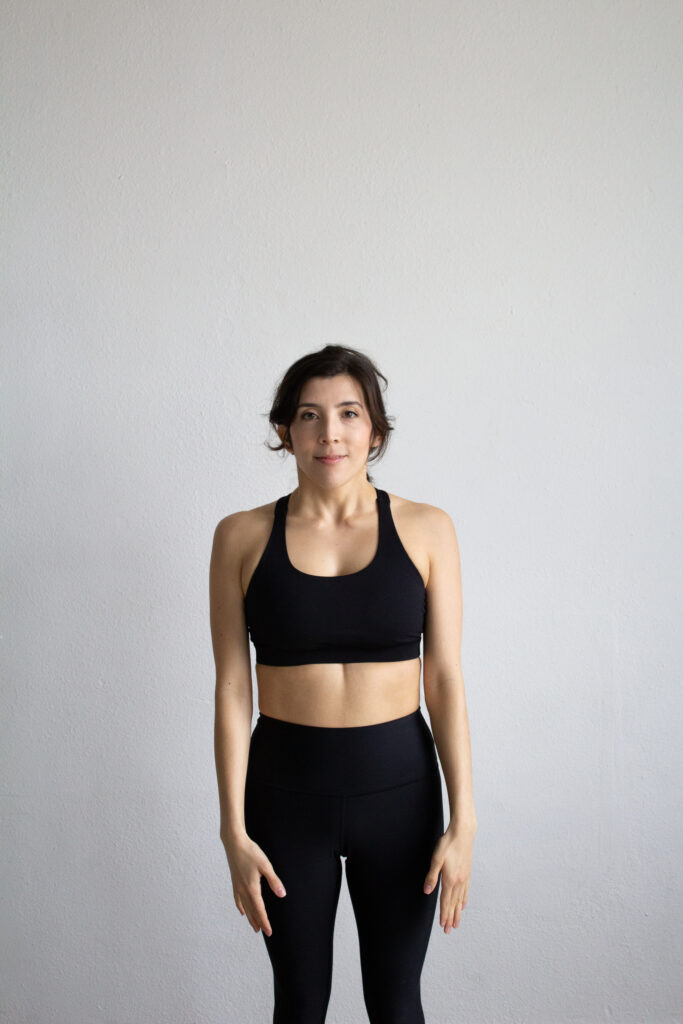
- Circle your arms backwards and above your head.
- Once your arms are behind your back, reverse the move and bring your arms back to the front.
- Repeat 10 times
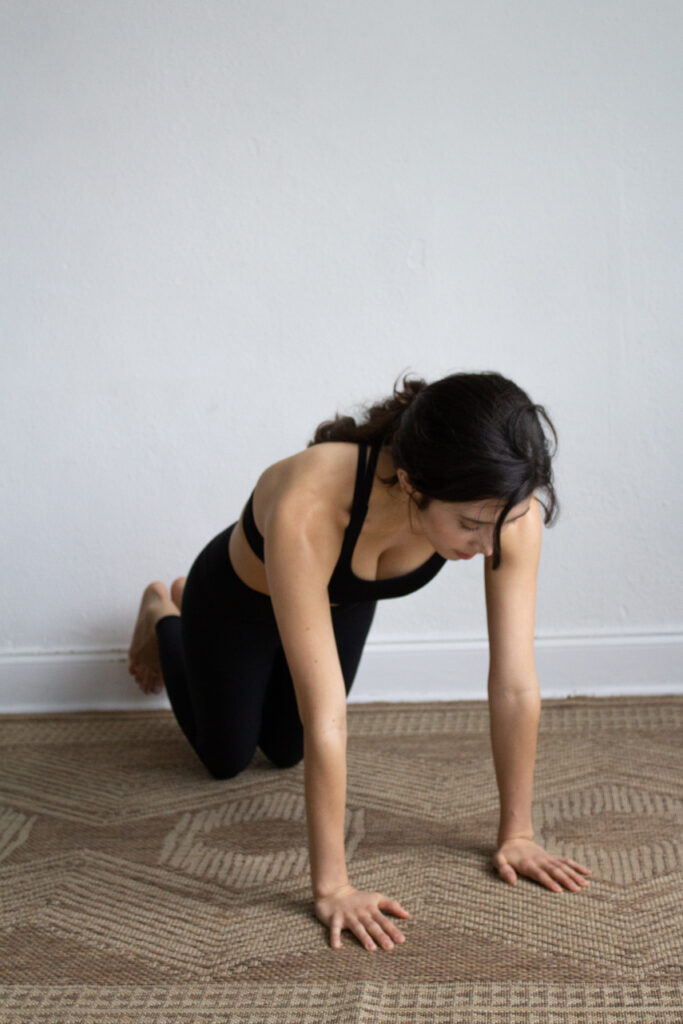
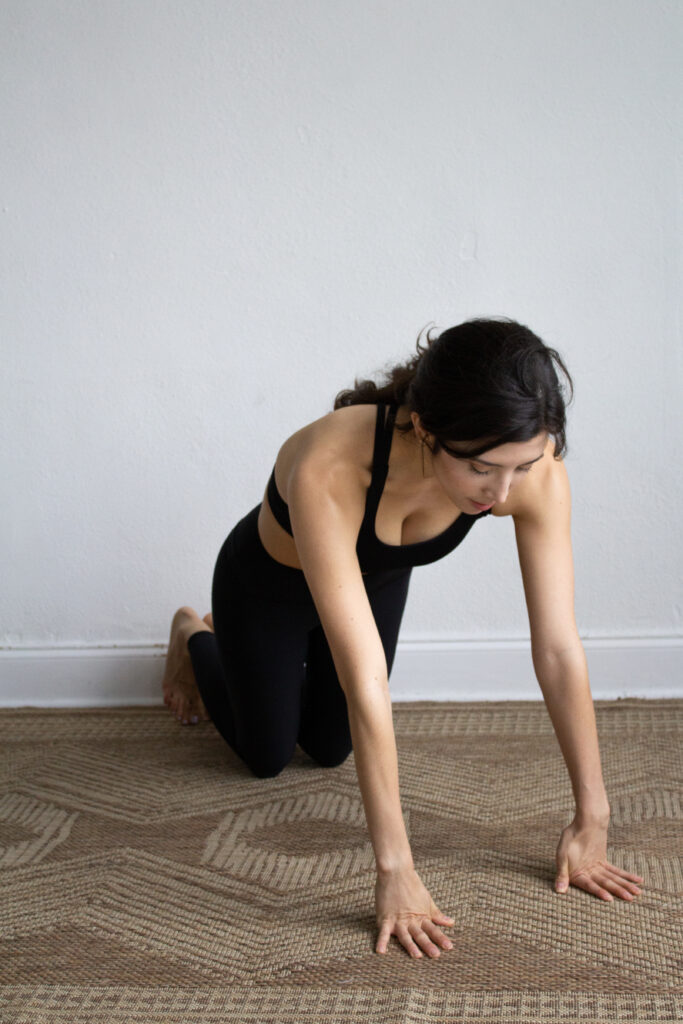
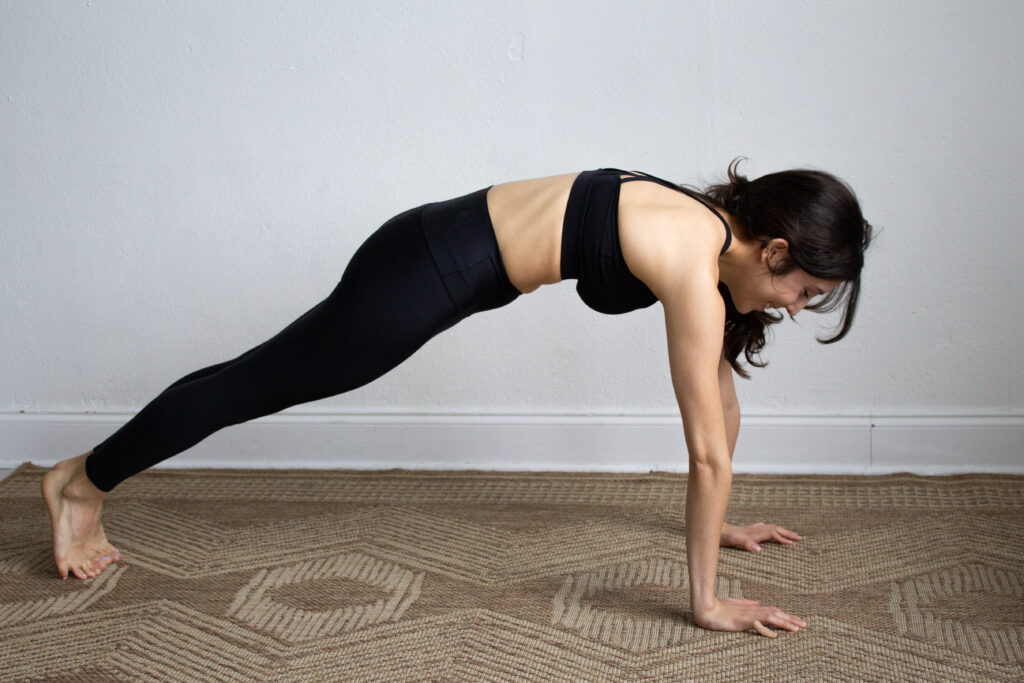
5. Plank Wrist Rocks
This exercise helps one to building strength in the wrists to shift your body weight. It helps to get used to the feeling of using your hands/fingers to balance.
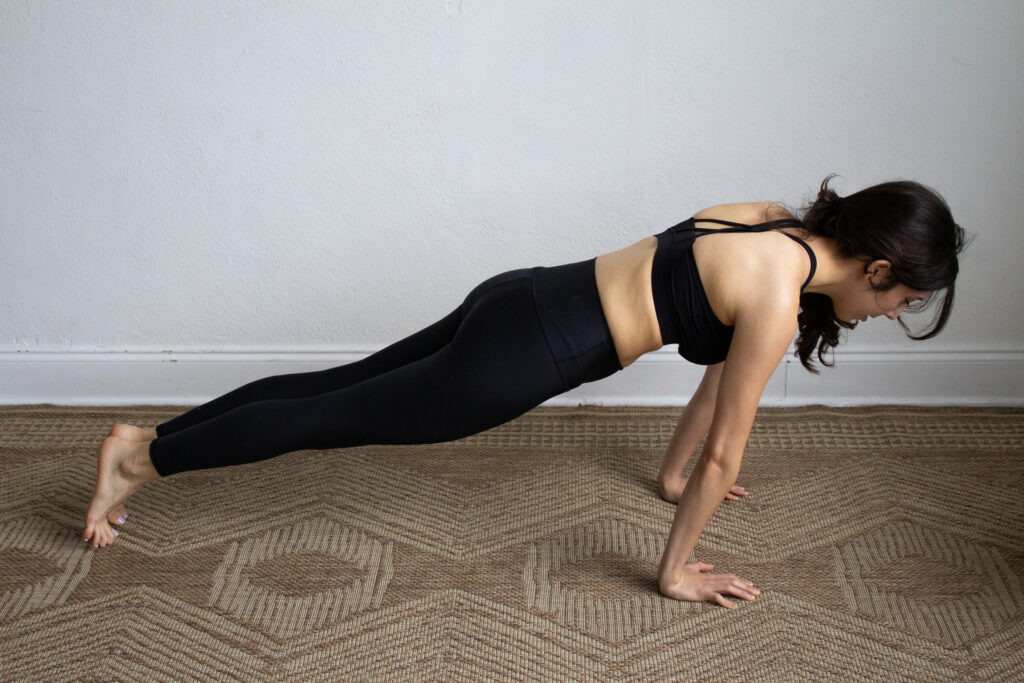
- Start in a high plank position.
- Shift weight and lean forward at knees until. Feel the weight of your body in your fingers.
- Push the ground with your fingers backwards.
- Repeat 20 times.
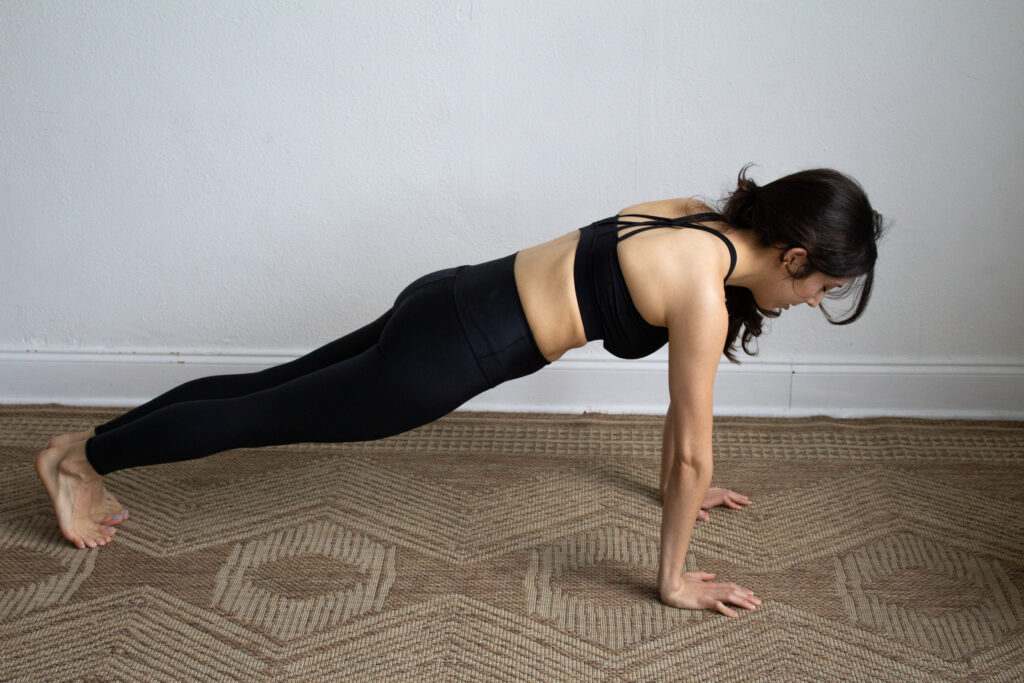
6. Scapular Push-Ups
In a handstand, you need to push through the shoulders. This exercises helps you strengthen the shoulders to push up and keep your shoulders tight next to your ears.
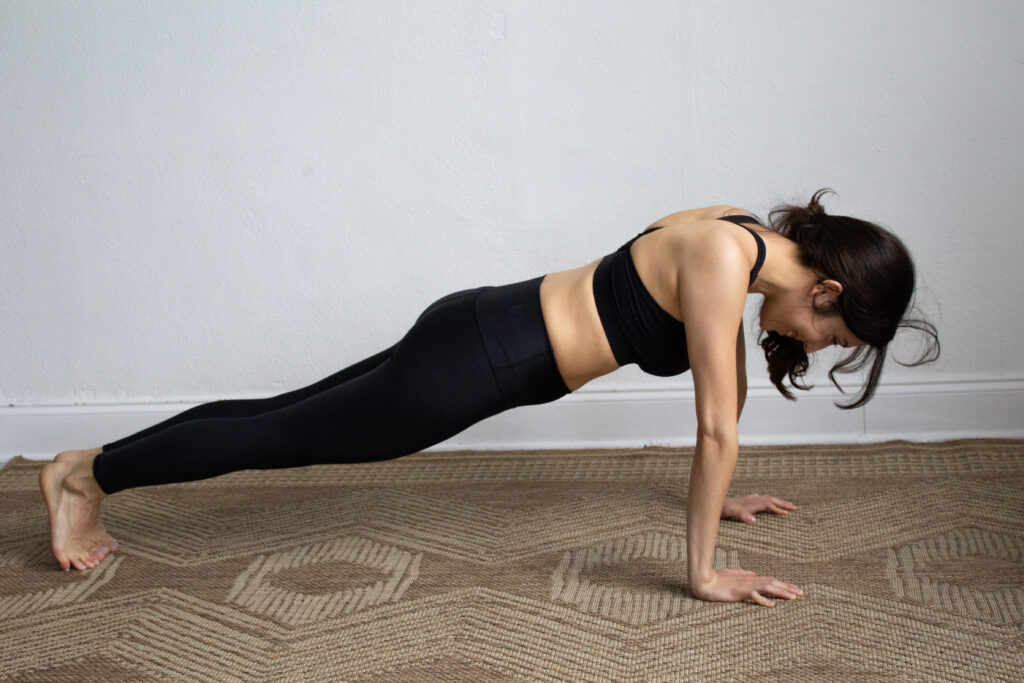
- Start in a high plank position.
- Keeping the position, squeeze your shoulder blades together.
- Push into the ground from the shoulders and separate the shoulder blades.
- Repeat 20 times.
7. Handstand Form Holds Face Down
The goal of this exercise is to practice the correct body position you should feel in a handstand.
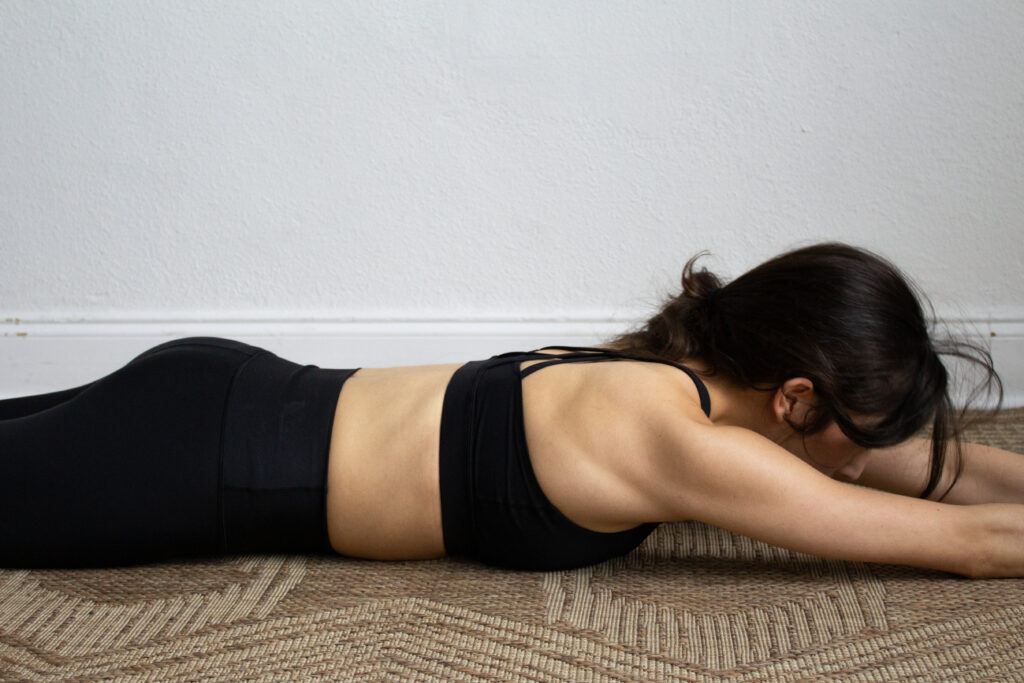
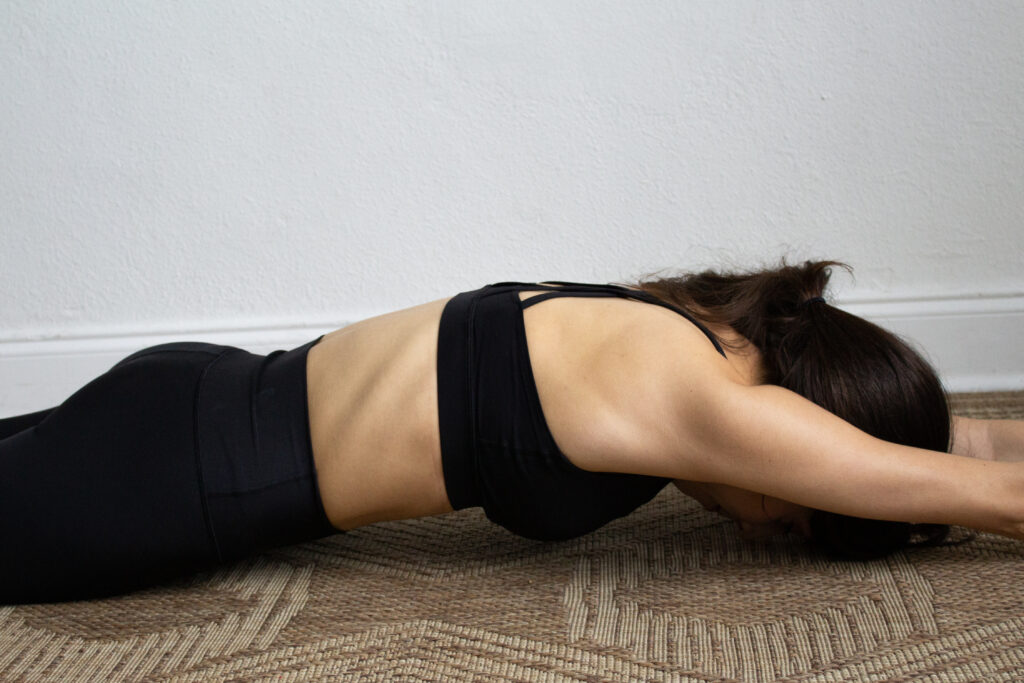
- Lay face down on the ground or yoga mat. Outstretch your arms above your head like you would in a handstand.
- Activate your core and shoulders. There should be space between your belly button and the ground.
- Hold for 20-30 seconds.
8. Pike Shoulder Press
This exercise helps you to strengthen your shoulders and arms to support your weight in a handstand.
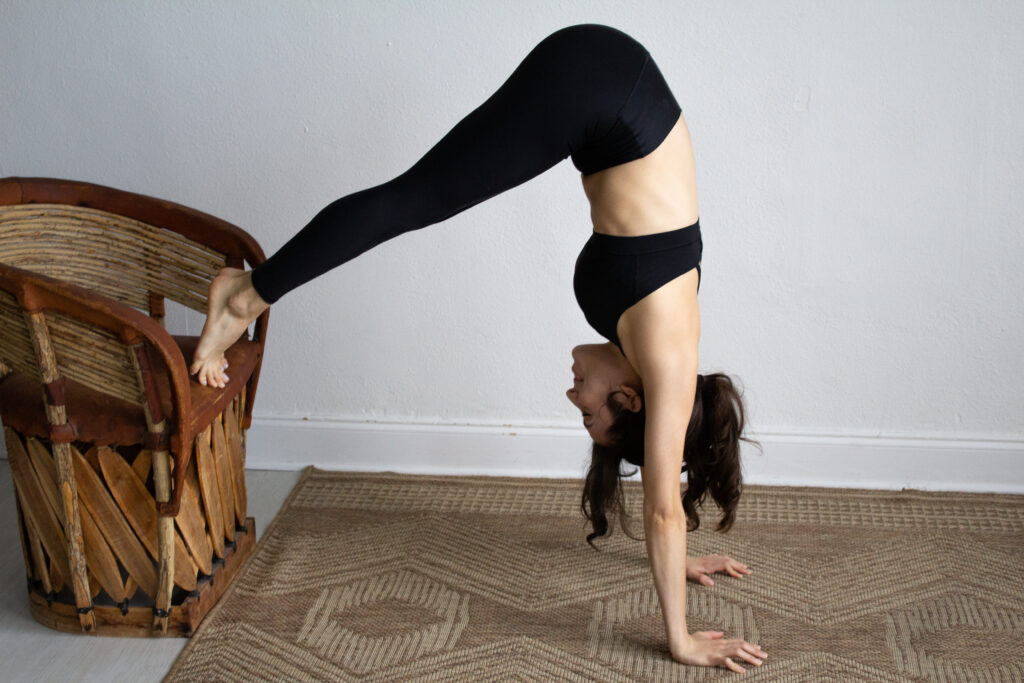
- You will need an elevated surface such as a chair, sofa, or bench.
- Put your feet on the elevated surface and hands on the ground. Walk your hands toward your feet and lift your bottom toward the sky.
- Push your shoulders through the ground, keeping them tight by your ears.
- Try to get your hips, shoulders, and wrists vertically in line. This may not be possible at first, just keep working on it.
- Hold for 20-30 seconds.
9. Boat Abs Hold
This position strengthens the core, hip flexors, and spine.
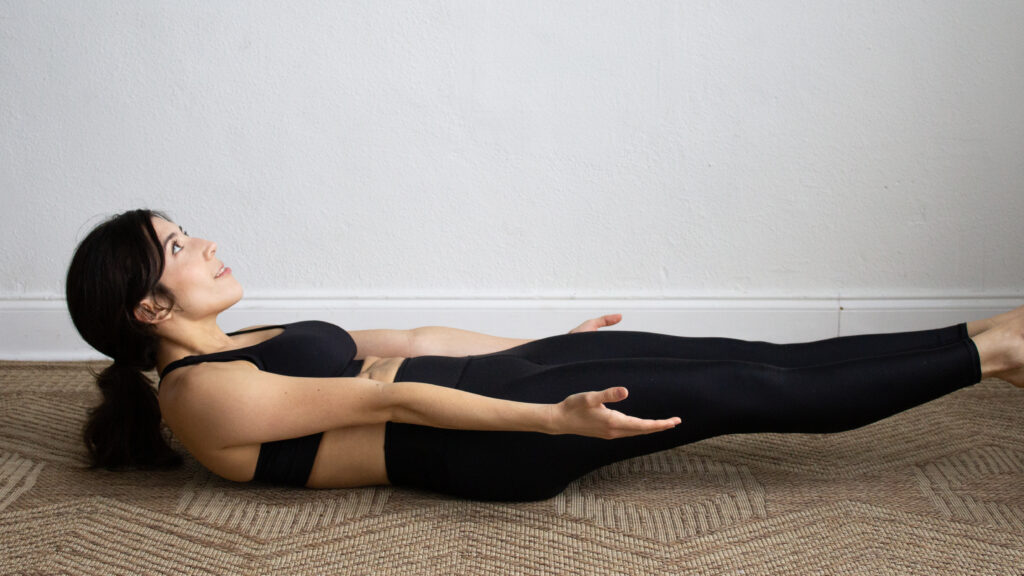
- Sit with your knees bent, feet on the floor.
- Engage your abs and draw your lower belly in and up. Straighten the legs.
- Bring your arms parallel to the floor
- Hold for 20-30 seconds.
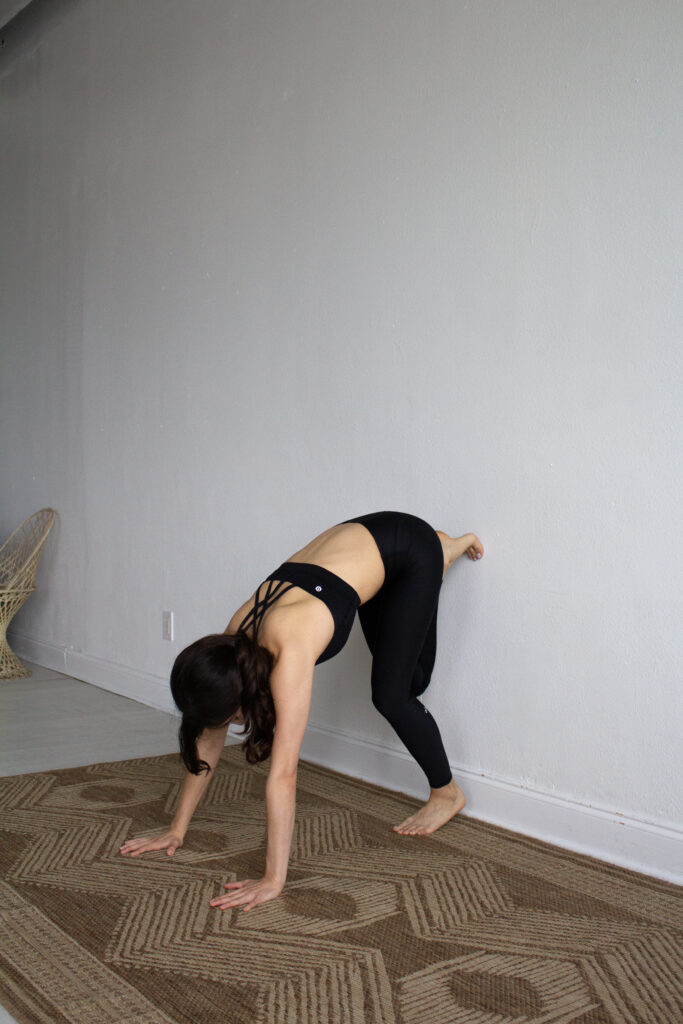
10. Spider Man Handstand
This position strengthens the shoulders, arms, and abs. It helps you practice good handstand form.
- Start by standing about a foot from the wall with your back to the wall.
- Place your hands on the ground and one foot on the wall.
- Slowly, walk your hands closer to the wall as you walk your feet up the wall, until your stomach is touching the wall and you are in a handstand position
- Hold for 20-30 seconds.
11. Handstand Walk Outs
This assists you in building the upper body strength to balance in a handstand.
- Start by standing about a foot from the wall with your back to the wall.
- Place your hands on the ground and one foot on the wall.
- Slowly, walk your hands closer to the wall as you walk your feet up the wall, until your stomach is touching the wall and you are in a handstand position.
- Walk your hands away from the wall, then walk your hands back towards the wall.
- Repeat 10 times.
12. Crow Pose
This is a great way to practice balancing on your hands. I recommend practicing with a thick pillow or cushion in front of your face to protect your head in case you roll forwards.

- Start with your feet shoulder-width apart. Place your hands on the ground.
- Slowly lean forward and put your knee on the back of your arm one at a time.
- When you are feeling confident, pick your feet off the ground one at time, trying to find the balance.
- Try to hold for 10 seconds or longer once your are more confident in your balance.
- Of note: you can try elevating your feet with yoga blocks or putting cushions under your head to make it easier.
13. Tuck Headstand
This is a way to get used to balancing while upside down, but it’s a little easier than a full-on headstand and a stepping stone to perfecting the headstand, and eventually the handstand.
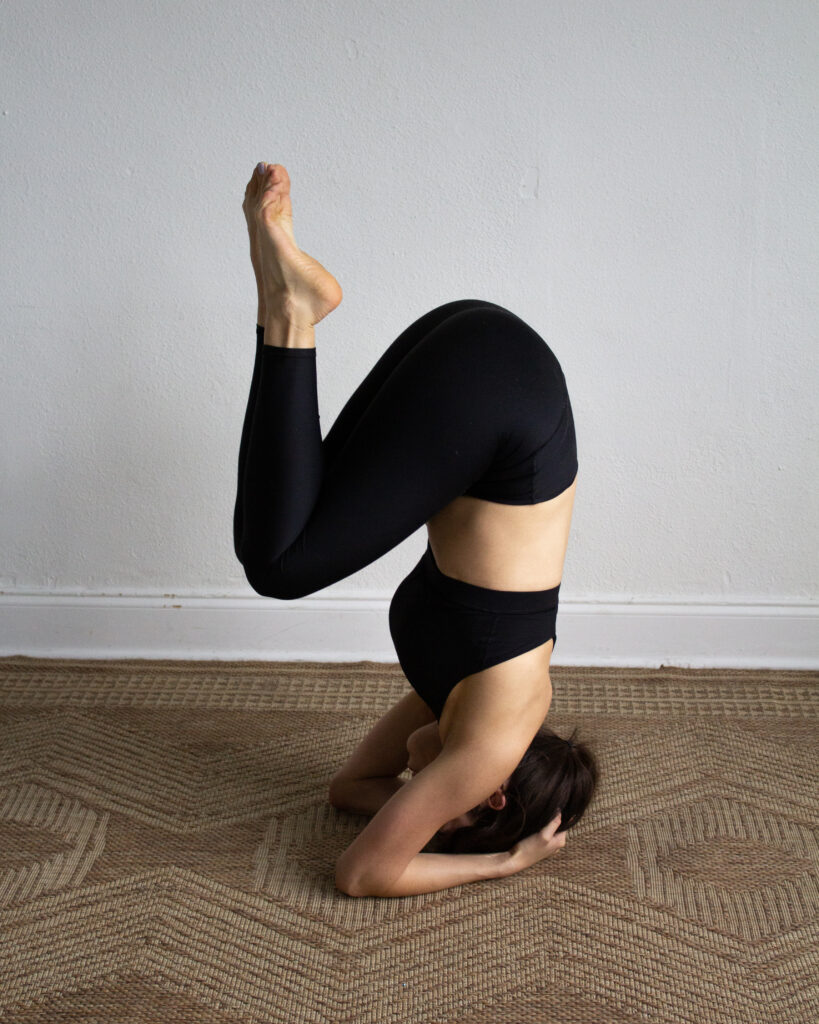
- Start in a kneeling position on a soft surface such as a mat, carpet, sand, or grass.
- Interlace your fingers and place your hands and forearms on the ground.
- Lean forward and cradle your head in your hands. Slowing use your core and back to life your bottom in the air, keeping your knees in a tucked position.
- When you feel a sense of balance, suspend your knees off of the ground.
- Try to hold the position for 10 seconds or longer.
14. Headstand
This is the next progression after the tuck headstand. This trains the core strength and balance you need to eventually master the handstand.
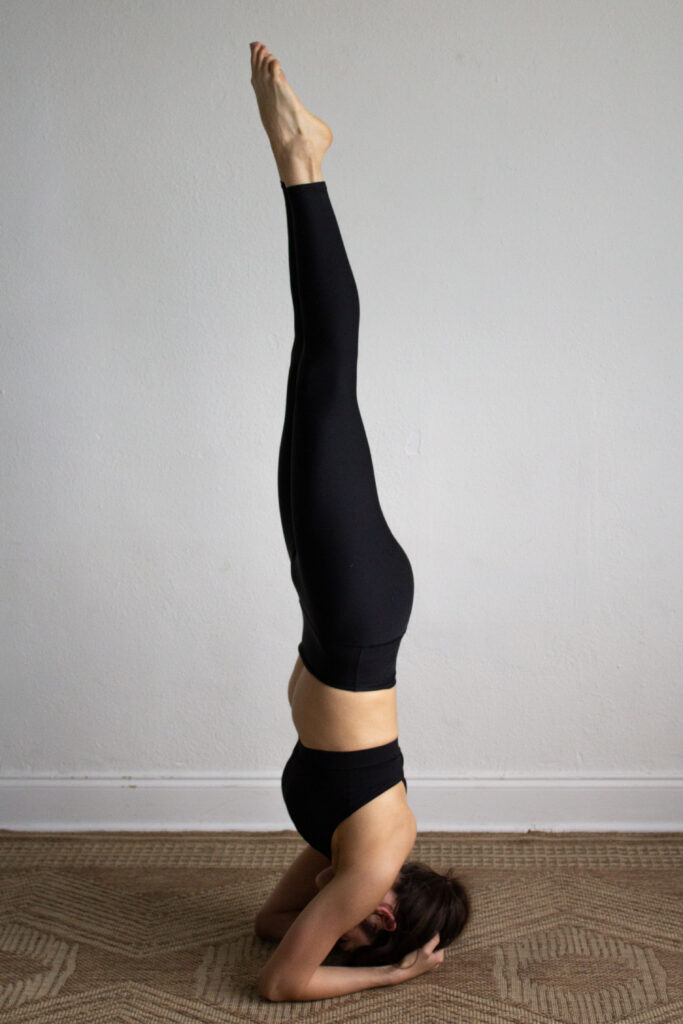
- Start in a kneeling position on a soft surface such as a mat, carpet, sand, or grass.
- Interlace your fingers and place your hands and forearms on the ground.
- Lean forward and cradle your head in your hands. Slowing use your core and back to life your bottom in the air, keeping your knees in a tucked position.
- When you feel a sense of balance, suspend your knees off of the ground, then slowly strengthen your legs and lift the toes to the sky.
- Keep your toes pointed and legs together. Keep the core engaged.
- Try to hold the position for 10 seconds or longer.
15. Handstand Kick-Ups
This is a great handstand drill for beginners. This helps strengthen your kick up and mobility to perform the handstand.
- Place your hands on the ground about shoulder-width apart.
- Kick one leg toward the sky, trying to reach the proper alignment as in shoulders above wrists, hips above shoulders, and feet above hips.
- Bring your feet together at the top. If possible, hold for a breath, then come down.
- Use a wall if needed.
- Complete 5 kick-ups with each leg.
16. L-Shaped Handstand
This exercise builds strength in the core and arms, and it helps find good alignment for balancing.
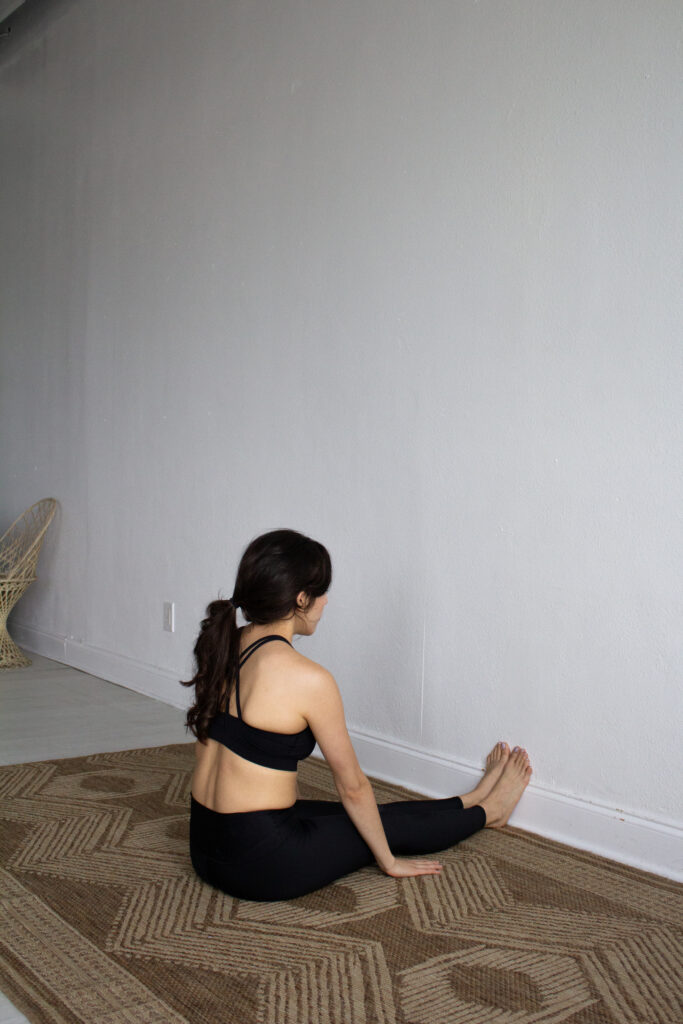
- Before getting your hands, estimate a good place for your hand placement by sitting in a pike with feet against the wall. Place hands besides your knees.
- Knee distance is about the right distance to so this exercise.
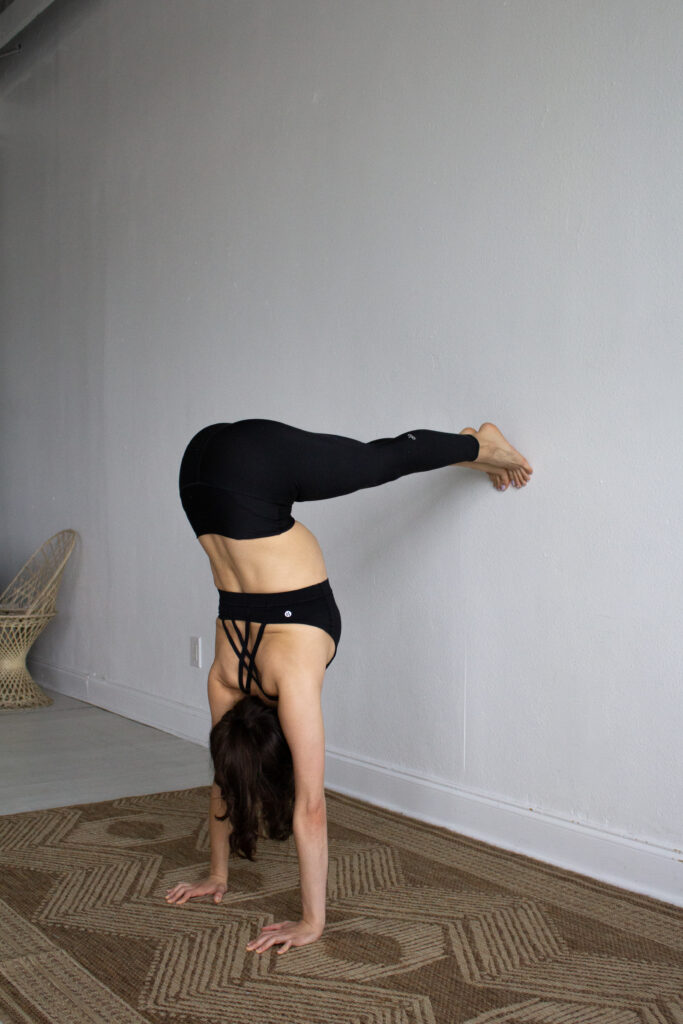
- Place your hands on the ground about shoulder-width apart. Place on food on the wall, the slowly walk the other foot up the wall.
- Once your feet are about hip height, straigten the legs and aim align your hips over the shoulders and over the wrists in vertical alignment.
- Push through the shoulders and keep the shoulders next to the ears.
- Hold for 20-30 seconds or until failure.
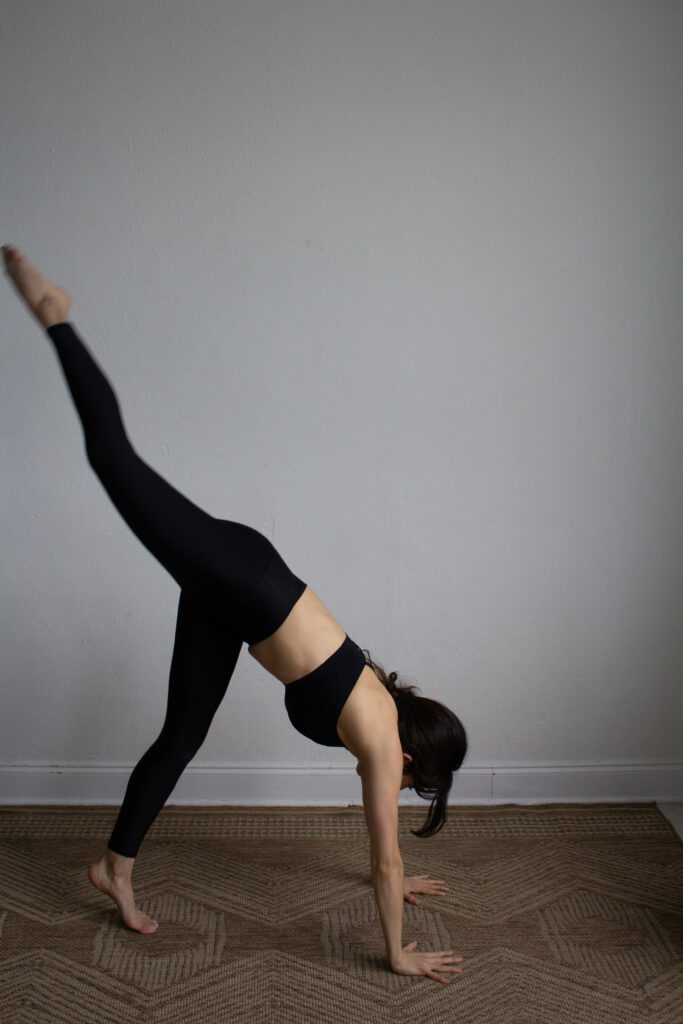
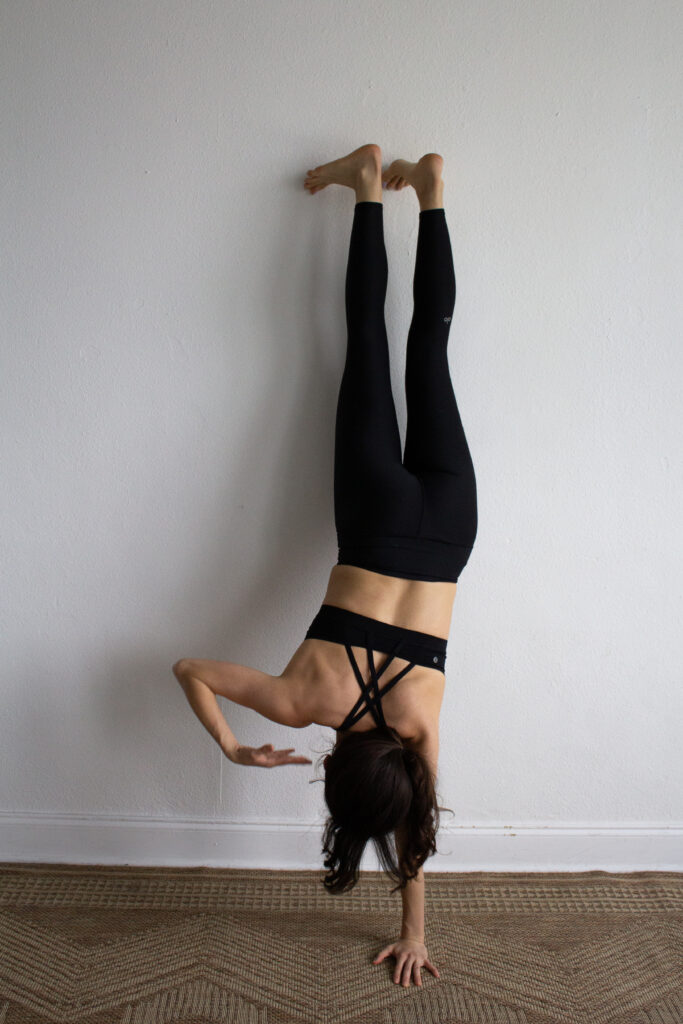
17. Handstand Levers
This is the next progression for a L-shaped wall handstand.
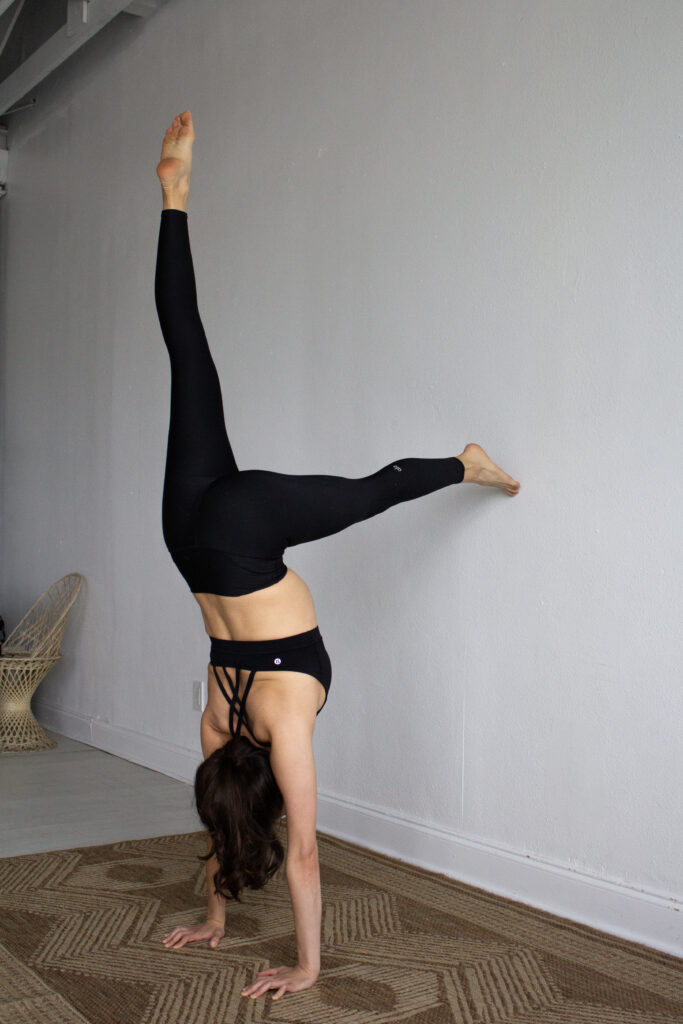
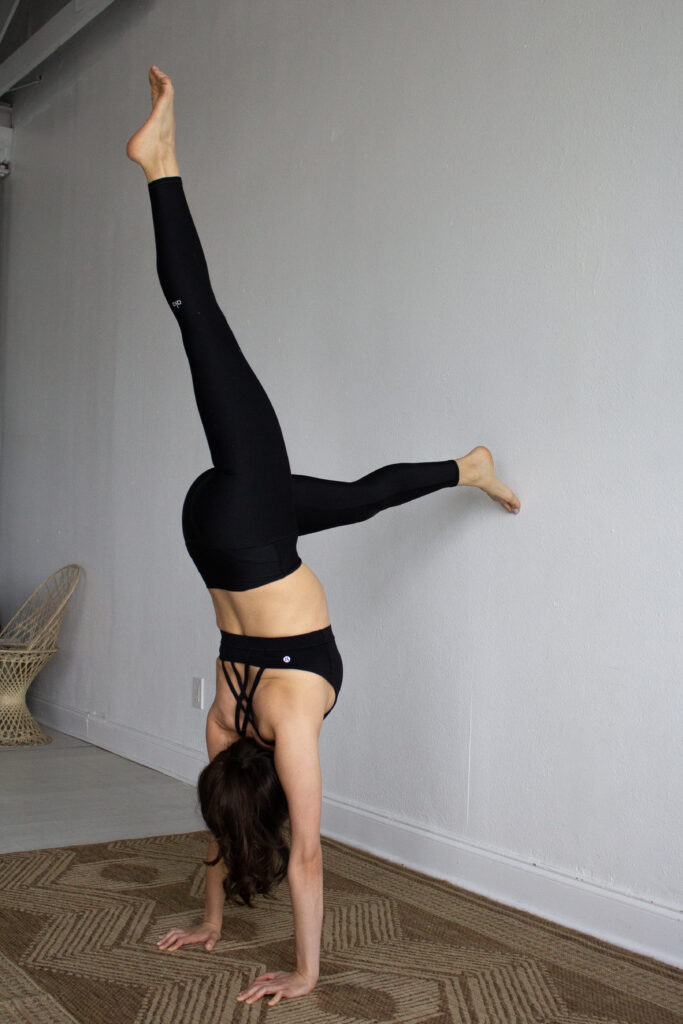
- Assume the L-shaped handstand (see above.)
- Keeping one foot on the wall, lift the opposite leg to the sky and maintain force in the hands and shoulders to maintain balance.
- Switch legs and keep the balance.
- Complete 10 times.
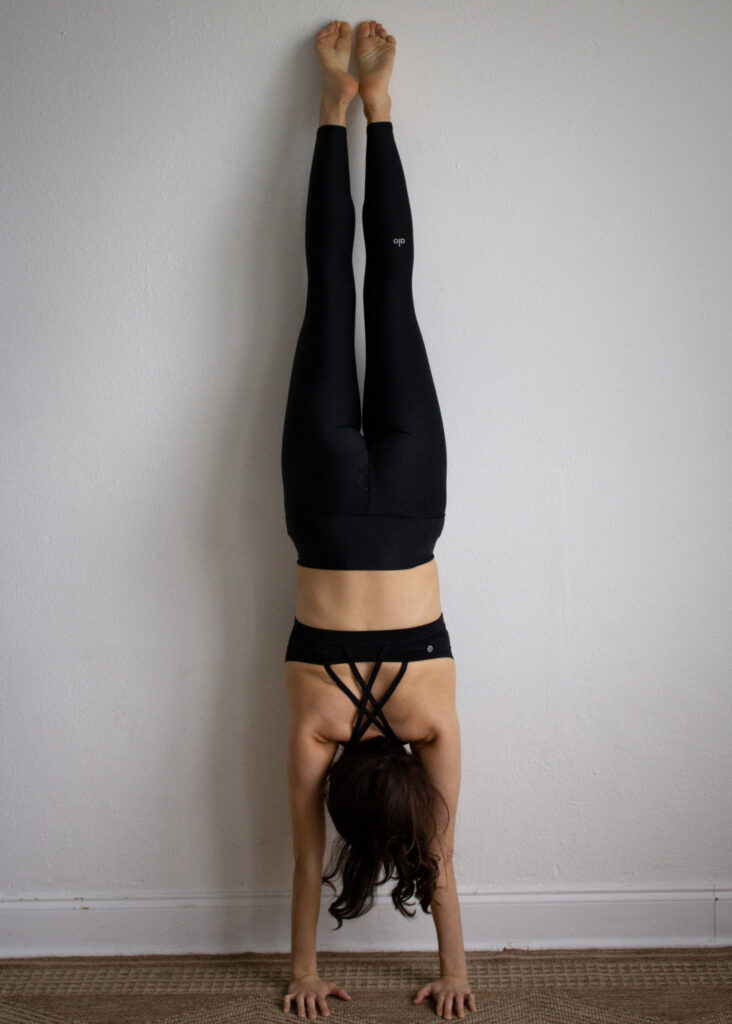
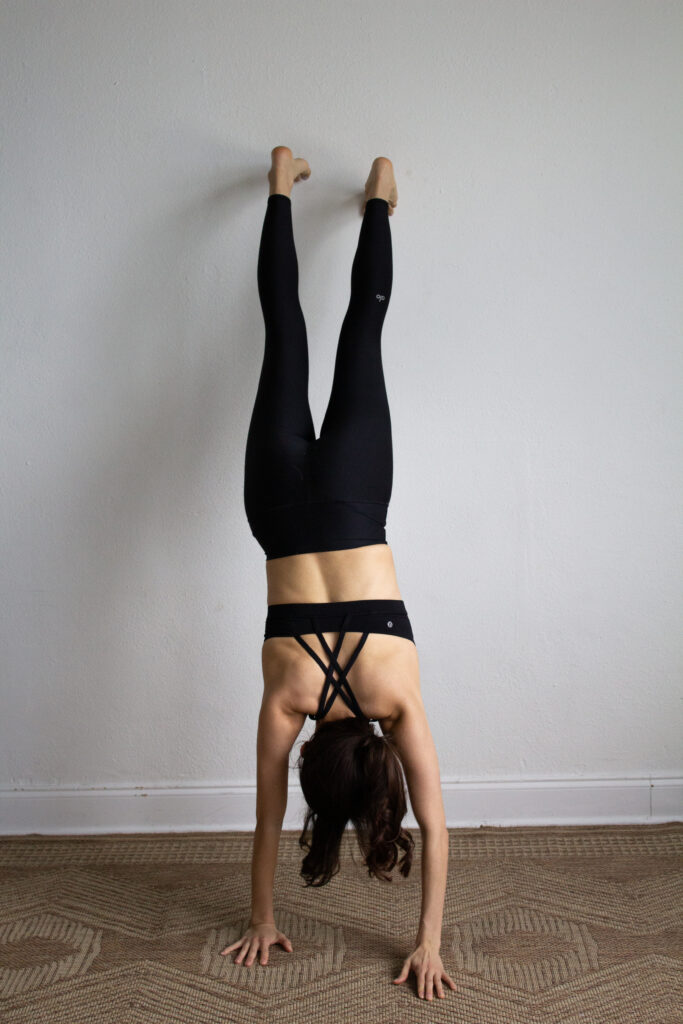
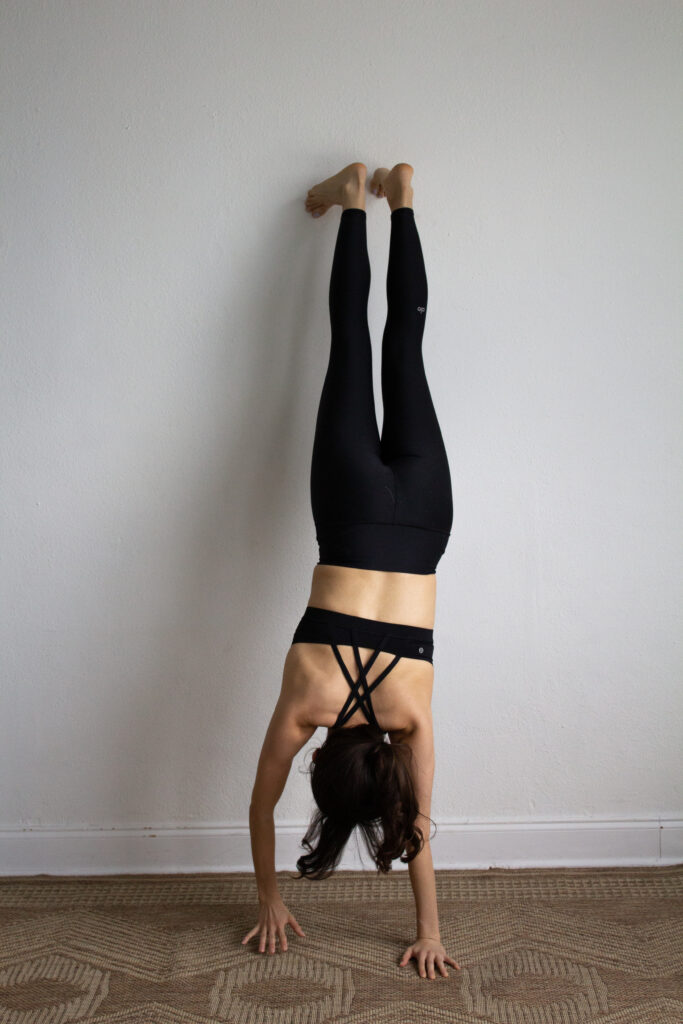
18. Wall Handstand
This exercise is a way to hold the handstand for strength building and to practice balancing on your own without the assistance of a wall.
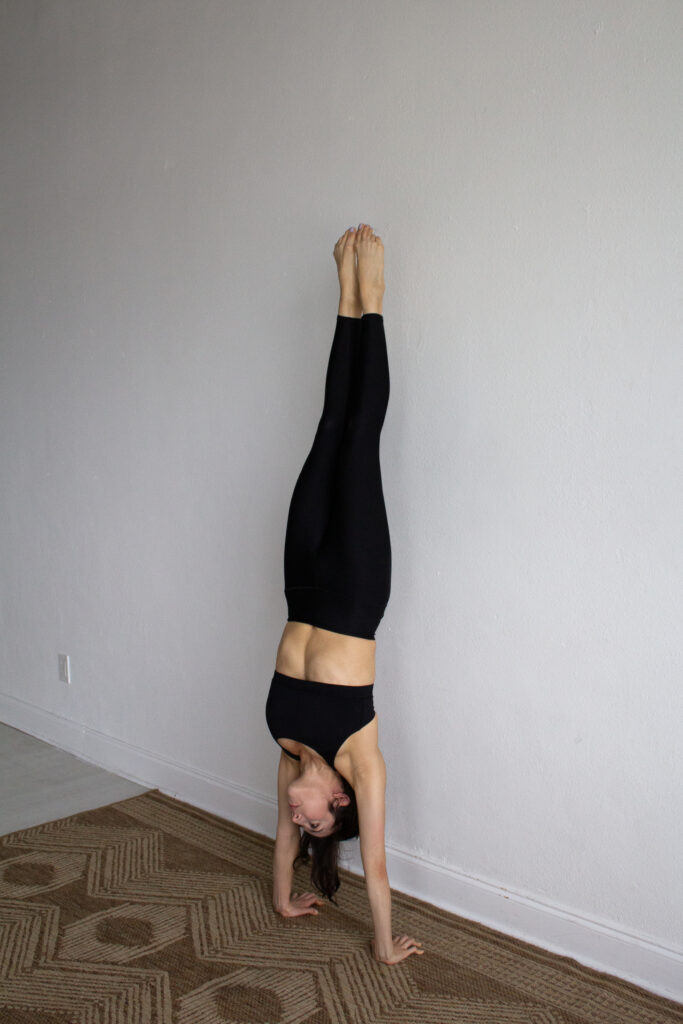
- You may kick up or tuck up into this position. Start by facing the wall.
- Crouch to the ground and place your hands on the floor, fingers spread out wide, and hands about shoulder width apart.
- Keep on leg in front of the other if you plan to kick up. If you tuck up, you may keep your feet together.
- Kick up or tuck up with your legs. Aim your feet to the sky.
- Try to hold for 10-30 seconds. If able, take one foot off the wall then the other and try to balance.
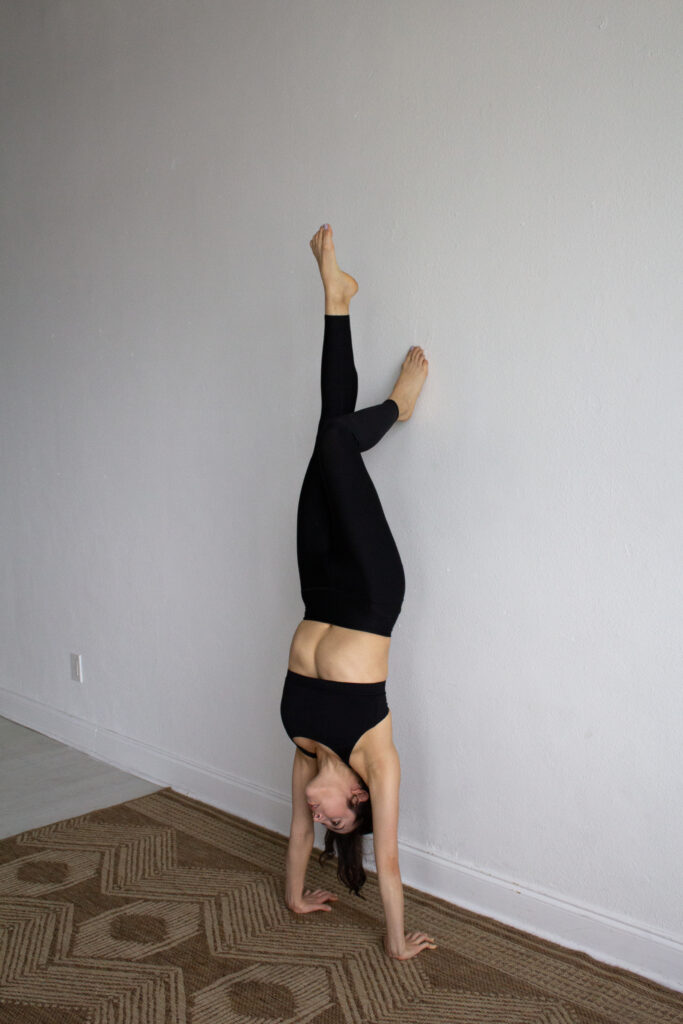
19. Shoulder Taps
This exercise helps build upper body strength. It advances one’s comfort while upside down.

- Start by standing about a foot from the wall with your back to the wall.
- Place your hands on the ground and one foot on the wall.
- Slowly, walk your hands closer to the wall as you walk your feet up the wall, until your stomach is touching the wall and you are in a handstand position
- Shift weight to one hand, then touch your opposite shoulder with the opposite hand.
- Repeat on the other side.
- Do 10 reps.
20. Practice Bailing From a Handstand
It is important to be safe and comfortable coming out of a handstand. Before going for the real handstand, practice what you’ll do if you need to bail from the handstand in order to stay safe.
- You may kick up or tuck up into this position. Start by facing the wall if you plan to use the wall for extra support/safety.
- Crouch to the ground and place your hands on the floor, fingers spread out wide, and hands about shoulder width apart.
- Keep on leg in front of the other if you plan to kick up. If you tuck up, you may keep your feet together.
- Kick up or tuck up with your legs. Aim your feet to the sky.
- Once you are up, cartwheel out of the handstand to safely land on your feet.
- Repeat 10 times.
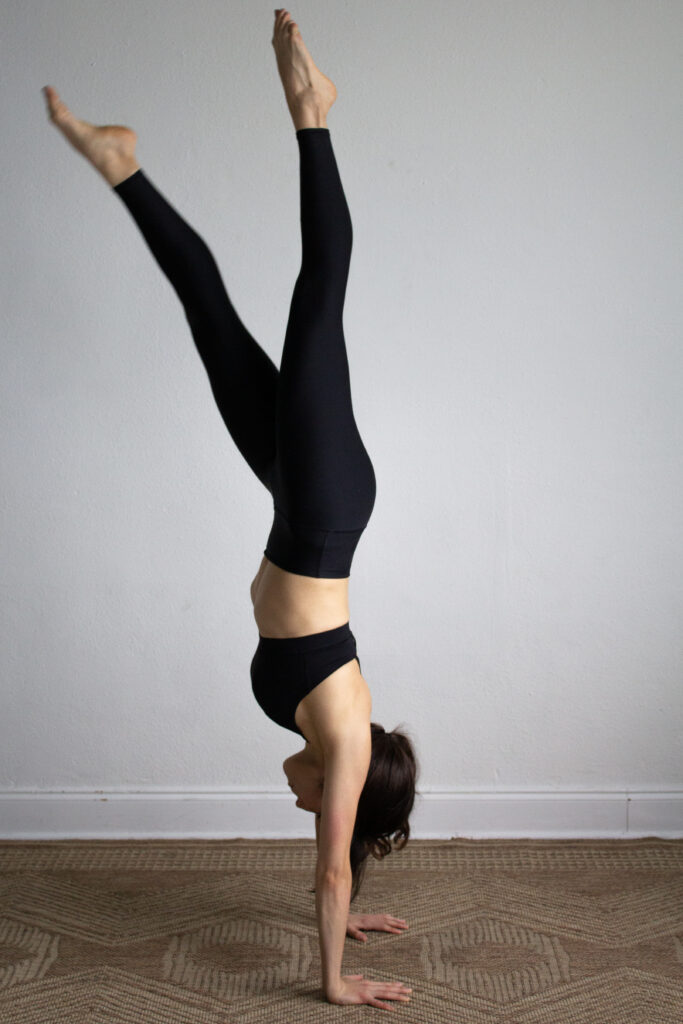
21. Free Standing Handstand
To get better at the handstand, you need to spend time on your hands. Attempt to kick up into a handstand if you’re comfortable. Use a wall behind you if you need.
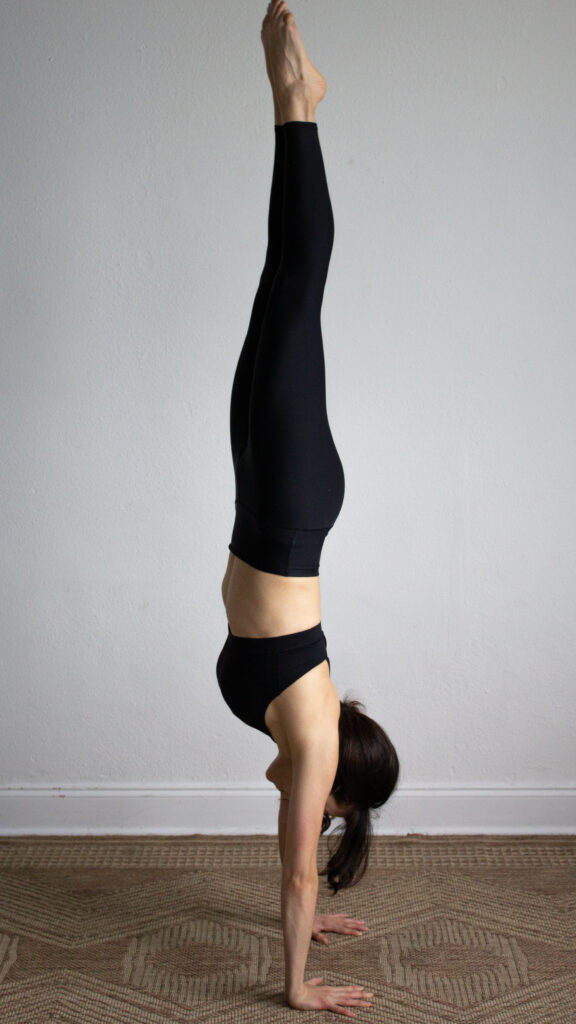
- You may kick up or tuck up into this position. Start by facing the wall if you plan to use the wall for extra support/safety.
- Crouch to the ground and place your hands on the floor, fingers spread out wide, and hands about shoulder width apart.
- Keep on leg in front of the other if you plan to kick up. If you tuck up, you may keep your feet together.
- Kick up or tuck up with your legs. Aim your feet to the sky.
- Try to hold for 10-30 seconds.
The Bottom Line on Handstand Drills for Beginners
I hope you found some helpful handstand drills for beginners to assist you in your handstand practice. Take each exercise as quickly or slowly as you need.
If you are trying to improve quickly, the best thing you can do is practice consistency. It is better to practice for 5 minutes a day than it is to practice for 3 hours once every two or three weeks. As stated by James Clear, “Consistency before intensity.”